I am a big
fans of Chrome OS, Google’s internet-focused operating system, which only
officially ships on its own and third-party Chrome-books. It’s lightweight,
boots quickly, and runs apps on the web through the built-in Chrome browser.
Better yet,
because your files are stored online, Chromium OS, on which Chrome OS-based, is
the perfect mobile operating system for running from a USB drive.
Chromium OS
is released by its developers as open-source code, which needs to be compiled before it will run. Fortunately, that's already been done for, if you instead download it from Chromium OS.
Following Steps To Install ChromiumOS on USB Drive.
Step 1
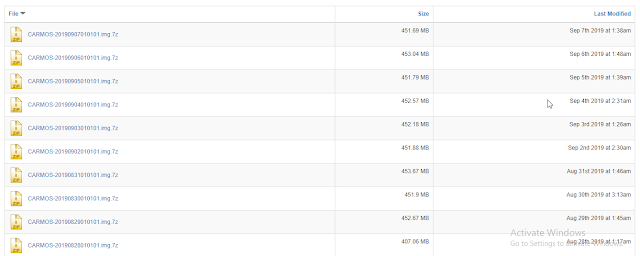
Click the
file at the top of the list for the most recent version. As you’ll see from its
extension, this has been compressed in 7-Zip format, so you’ll need to download
7-Zip from 7-ZIP (if you don’t already have it) to open it. Save the
expanded file to the desktop so it’s easy to find.
Step 2
In the
meantime, download and install Etcher, which performs a similar function to Rufus in that it formats and makes your stick bootable, then installs the operating system on it.
Step 3
LaunchEtcher, click Select Image and point it at the file you unzipped from the Chromium download.
Step 4
Click Select
Drive and choose your USB stick, then click Flash. Etcher will wipe your stick
and create several partitions on it, which Windows will see as unformatted
virtual drives.
When the process completes, Windows will offer to format each partition in turn – you
should cancel the offer every time.
Step 5
Quit Etcher
and any other running programs, but leave the USB stick connected and restart your PC so it boots into Chromium. See the section below for advice on setting your PC to boot from USB rather than its internal drive.
So by following these five simple steps, you can install and run Chromium OS on your USB Drive.


 Trends is an amazing magazine Blogger theme that is easy to customize and change to fit your needs.
No comments
Post a Comment